Next to grass, the concrete slab has become the garden’s most important and most used floor covering. This is natural, because concrete blocks and slabs of concrete have a wide range of benefits. It is very sustainable. Shape, color and surface structure can be varied in many ways. If the concrete slabs are not too large, they are also relatively easy to lay.
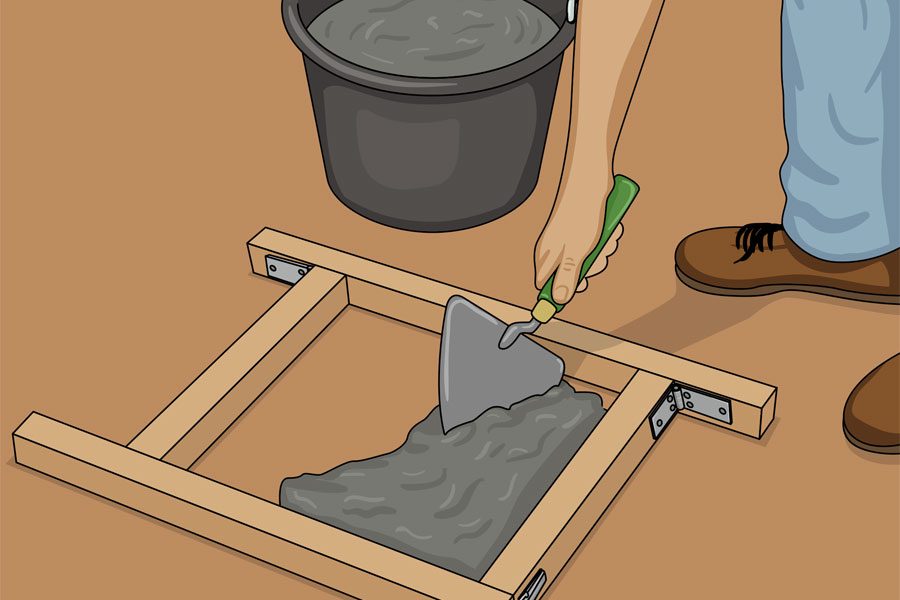
If you like the challenge of making as much as possible for your house yourself, it is a good idea to also cast the concrete slabs yourself. In some cases, it is even necessary. Maybe you want to supplement your old concrete slabs that have a shape that is no longer on the market. Or you do it just because it’s fun, but of course you feel that you do not have the time required, concrete slabs are still a pretty cheap alternative to buy!
In itself, a dense lawn is ideal as a floor in a garden. It is soft and harmonizes well in color and structure with other plants. But unfortunately, the grass does not fit on all surfaces.
No matter how much care you put into a lawn, you can never get it so even that the garden furniture is completely stable. You can also not get it so durable that it is not injured by daily car traffic from and to the garage or parking lot.
A lawn marked by walkways is not a constructive sight either. In addition, the grass requires very regular and careful care if the carpet is not to decay. And it’s certainly not just about haircuts.
Against this background, it is obvious that, where it is practical, one goes in for harder materials. Many garden owners put a lot of effort and money into concrete floors and paving stones . Others invest just as wholeheartedly in, for example, natural stone. Despite the great choices, most still choose concrete slabs for their balconies, garage driveways and corridors.
One reason is the regularity of the concrete slabs, which means a lot to the laying. Another is, after all, the price. Other materials would probably have resulted in greater variations, but on the other hand, the price you usually have to pay for these would have been followed by savings on other materials and amenities.
The very best and above all the nicest floor solution for the garden is usually to mix materials that harmonize with each other and with the plants. But even this often causes financial worries. One way to afford such extravagances is to cast the concrete slabs yourself.
If you do not count your own working hours, this home manufacture is undoubtedly the cheapest and can mean that it will be one or another penny left over for something more luxurious. It is not difficult to cast your own concrete slabs, but it takes time and you have to be patient enough to wait with the actual laying until you have put together a sufficient number of ready-to-lay slabs.
Read about popular types of retaining walls
Appropriate number of molds
In order for you to be able to cast your own concrete slabs, you must manufacture a number of molds to cast in. The size of these molds must of course depend on how large concrete slabs you want. You are wise not to choose too large a format, as the tiles will then be so heavy that they will be difficult to lay.
The format 500 x 500 millimeters should not be exceeded. One of the more common formats is 400 x 400 millimeters and already with this format you have to reckon with the fact that each individual plate weighs between 12 and 15 kilos.
Of course, there is nothing to prevent you from, for example, halving the format to 200 x 200 millimeters or casting rectangular concrete slabs in the size 400 x 200 millimeters.
If you are particularly interested in pattern making, you can of course copy or compose your own patterns according to your own imagination: crosses, triangles, octagons, rods, brick format…
The easiest way is to place loose wooden inserts in square or rectangular shapes. One thing you should not get involved in is casting irregular concrete slabs. It is not in itself more difficult to cast them, but to put them in a pattern that you will be happy with is practically doomed to fail.
The plate size is of great importance for durability. If you cast half-meter-sized squares, the thickness should be 70 millimeters. If, on the other hand, you make half as large concrete slabs, 50, possibly 60 millimeters will suffice. The tiles still have good durability.
Regardless of the surface size, the thickness should be 70 millimeters if you intend to lay the concrete slabs on, for example, the entrance ‚or garage floor, where car traffic occurs. How many molds you have to make depends on the pace at which you want to cast the concrete slabs.
Since you can not cast more than two rounds a week, you will then reach a capacity of 80 tiles a month.
Tools and materials you need when casting concrete slabs:
Tools for the molds:
1. Joint tail 2. Screwdriver 3. Core 4. Ruler 5. Angle hook 6. Drill.
Materials for the molds:
Planed formwork, not smaller than 46 cm, Articulated iron, Eccentric hasp, Screw.
Tools for the tiles:
7. Bucket 8. Tile 9. Grating board 10. Brush for oil 11. Ceiling brush 12. Steel disc for grinding 13. Wheelbarrow or mortar bucket 14. Shovel.
Materials for the tiles:
Cement, Single, Sand or Aerated Concrete, Silica or other surface layer stone. Form oil, Hard building boards such as Masonite or thick plastic foil, ev. Cement paint.
Work sequence
- Manufacture of molds.
- Mixing of concrete.
- Casting of the concrete slabs.
- Loosen the molds after about 4 days.
- Drying for about 3 weeks.
Warning
If you cast at a temperature lower than +5 degrees, you should wait a week to take the concrete slabs out of the molds, twice as long as in warmer weather. Concrete can not harden without enough water. In the event of a risk of freezing temperatures, it is very important that the newly cast concrete is covered as soon as possible with e.g. insulation mats or straw laid on top of plastic foil. The water in the concrete must not freeze.
Mold making
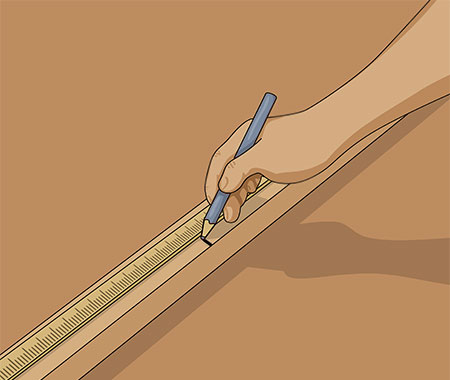
Start by measuring the planed formwork. Do not choose leaner wood than about 80 millimeters.
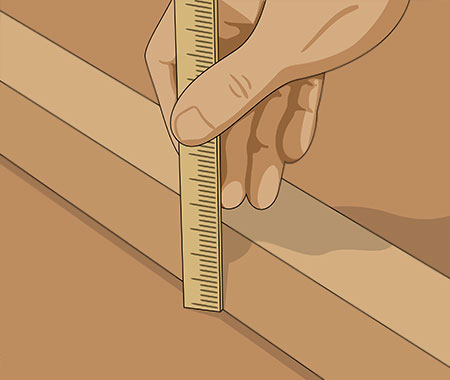
But make sure that the height of the wood will correspond to the thickness of the slab, eg 70 millimeters.
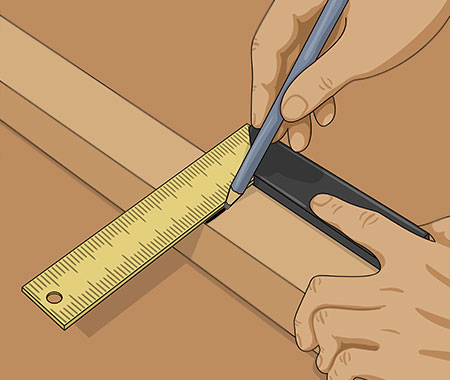
Make sure that each piece of mold has an exact dimension. Also make a vertical saw marking using the angle bracket.
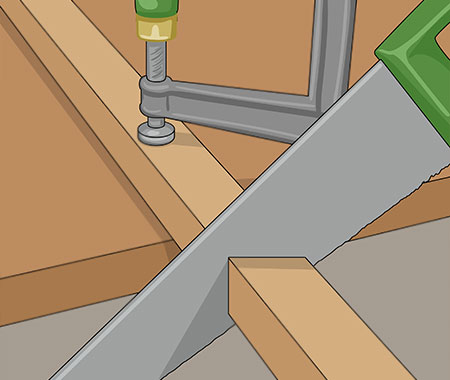
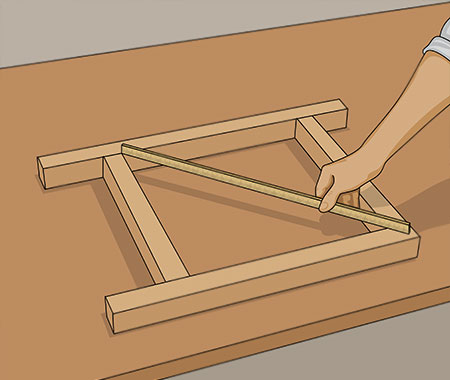
Lay out the different shape pieces and measure the diagonals with a ruler to get exactly right angles.
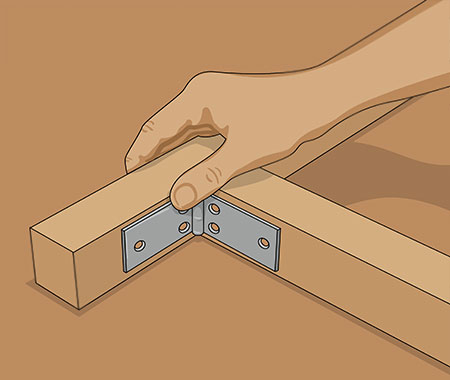
Mount three of the mold pieces together with ordinary, simple hinges, preferably with three screw brackets on each side.
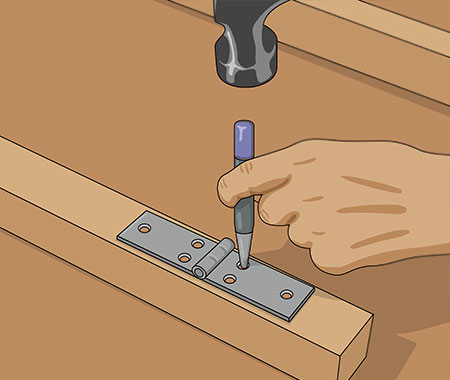
Pre-drill for the screws or arrange a good bracket for them using a so-called core.
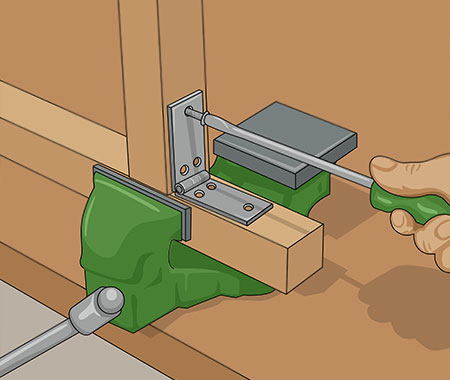
Attach the mold pieces to a vice so that they do not slip apart when you tighten the screw connection.
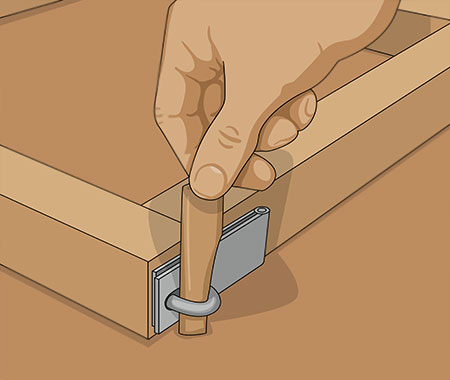
Provide the fourth corner joint in each mold with a locking device. You can use a regular padlock hasp.
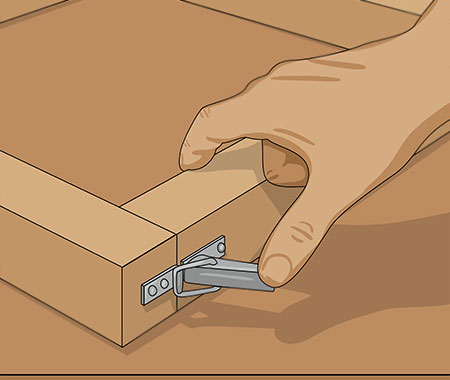
However, it is even better if you choose a so-called eccentric hasp, which tightly tightens the frame during casting.
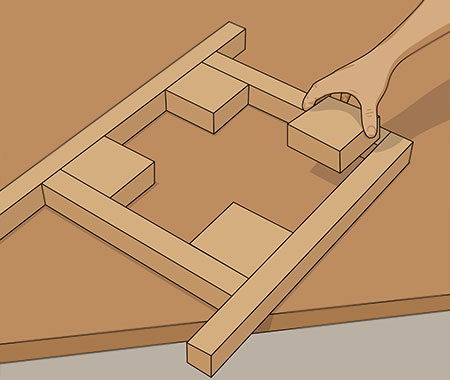
If you want to cast cross-shaped tiles, for example, place loose angles in the corners of the square shape.
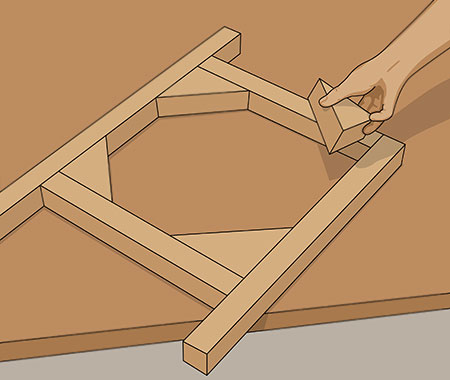
You also arrange octagonal shapes with loose inserts. However, be very careful with unambiguous measurements for all shapes.
Concrete mixes
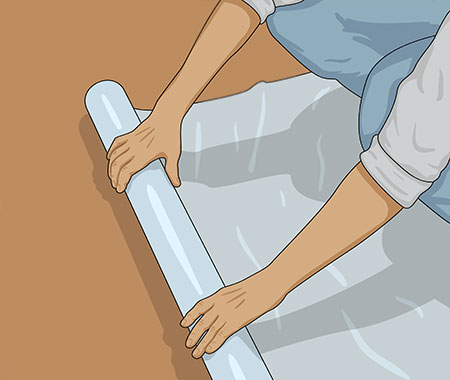
1. Place protective plastic where you are going to work. It is important to avoid both concrete splashes and unclean elements in the concrete.
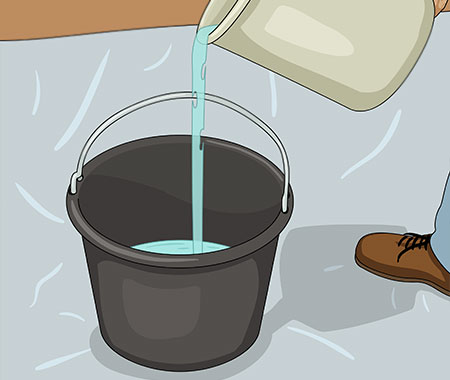
2. It is easier to mix the aerated concrete if you first pour in some water in a wheelbarrow or mortar bucket.
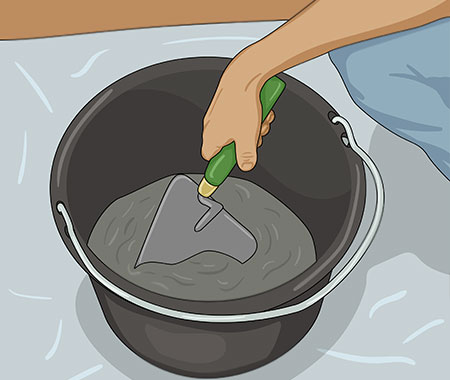
3. Mix thoroughly and with the correct amount of water. It is i.a. crucial for whether the concrete will be frost-resistant.
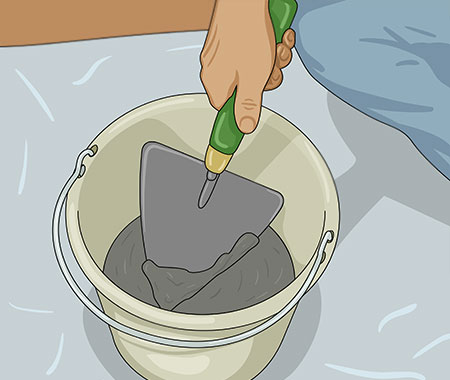
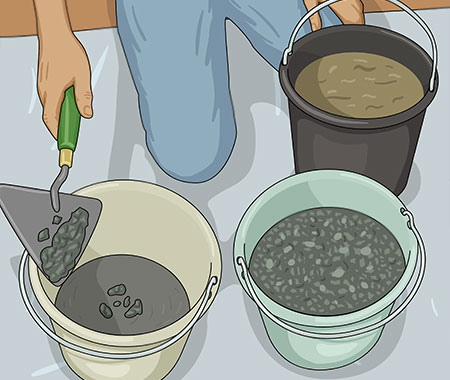
5. If you want a more rustic surface layer, you can mix silicon, other natural stone or crushed stone in the fine concrete.
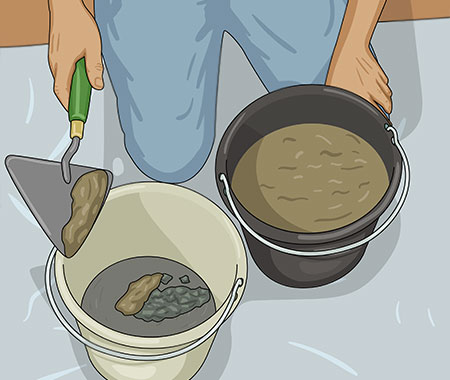
6. A suitable mixture is then four parts stone, some concrete and some fine sand. Increase the humidity slightly.
Correct proportions and two flat layers
In principle, a concrete slab should consist of two layers: the base layer and the surface layer. The latter is sometimes also called the fine layer. If you choose a plate thickness of 60 millimeters, the base layer can suitably be up to 50 millimeters and the surface layer thus about 10 millimeters.
When you are going to cast in concrete , you can buy ready-made concrete in a sack and mix it yourself. You are wise to follow the packaging’s instructions, but for the surface layer, the rule of thumb is 1 part cement, 4 parts shingle and a suitable amount of water. The less water you can use, the better the concrete. Approximately 0.6 liters of water to 1 kilo of cement is considered a level that should not be exceeded.
For the finer surface layer, you can mix a concrete mass of 1 part cement and 2 parts fine sand. The amount of water can be the same as for the base layer.
However, you can make flat casting much easier by using cast concrete, a powder that you mix to the right consistency with just water. For the base layer you can then use aerated concrete and for the surface layer fine concrete. About 2.5 liters of water are needed for a 25-kilo sack of cast concrete.
The method costs a little more, but you should take into account that it is quite heavy to mix even this “semi-finished product” and much heavier when the single is to be added. Since you will probably not get rid of any large amounts of concrete mix for each casting, it is hardly worth renting or getting a mixer.
You can probably handle the concrete mixture without much difficulty in a wheelbarrow or on a flat building board, a so-called lichen. Yes, of course you also need a shovel.
When mixing the concrete, keep in mind that you are not splashing the surroundings. It is very difficult to remove concrete stains afterwards. It is also important that you do not contaminate the concrete mixture with, for example, soil, something that can drastically impair durability.
Never mix more concrete than you consume for about an hour and do not forget to clean the cart and shovel before the mass sticks. In both cases, you incur completely unnecessary costs. Leftover concrete mix is completely unusable and must be discarded. Utensils and molds that are not cleaned are also scrapped.
Rigid concrete best for concrete slabs
In the same way that a distinction is made between aerated concrete and fine concrete, a distinction is made between three different concrete consistencies. Each is identified as follows:
- Rigid concrete you can roll in your hand to a ball without it smearing.
- You can also shape plastic concrete into a ball. It smears, however.
- Viscous concrete can not be formed into a ball. When casting concrete slabs, the most suitable concrete consistency is rigid.
Casting and drying
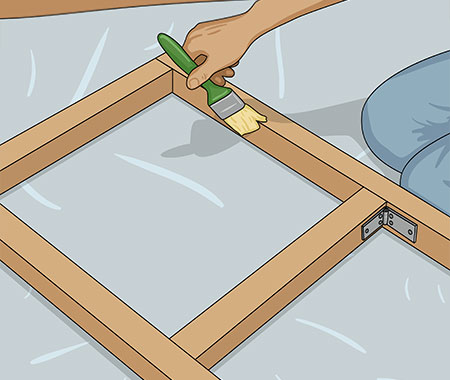
In order for the concrete to release, you must, before each casting, apply form oil to wooden parts that are affected by the concrete.
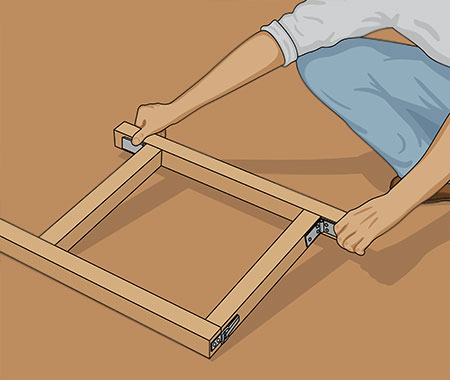
Lock all the molds you are going to cast in and place them on an absolutely flat and hard surface, eg masonite boards.
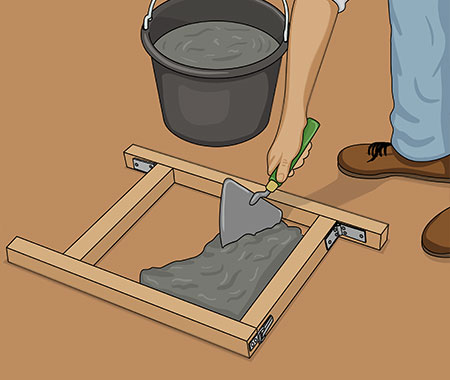
Use the trowel to distribute the primer mixture well. Fill almost to the total thickness of the plate.
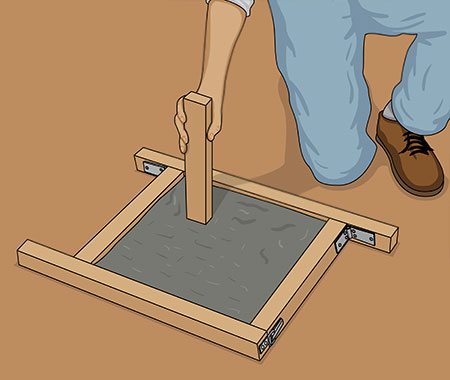
Then pack the concrete mixture tightly using, for example, a piece of strip. It is important that no air spaces are formed.
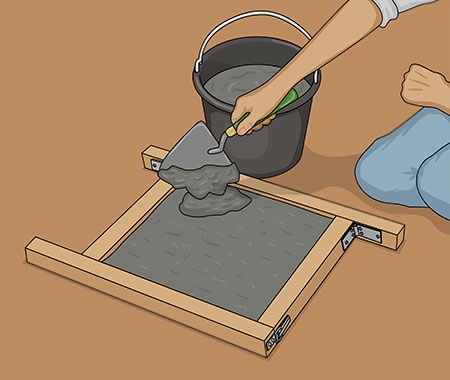
When you have leveled the base layer with the trowel, you can apply the thinner surface layer over the entire surface.
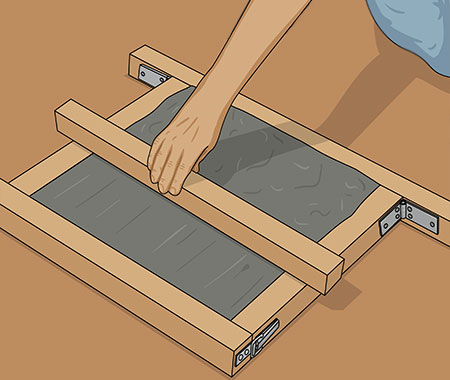
Use a straight board and pull with a firm hand determined by excess concrete.
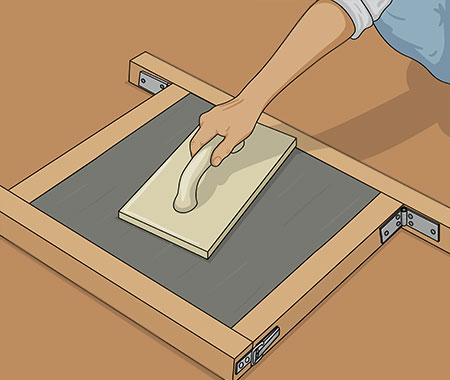
If you have smoothed the surface layer, wipe off the surface with a thoroughly dampened grating board. Work in small and circular motions.
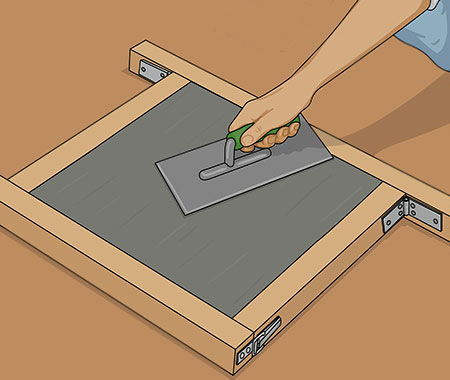
About half an hour after demolition, you can smooth the surface layer with a steel board alternately sideways / perpendicularly.
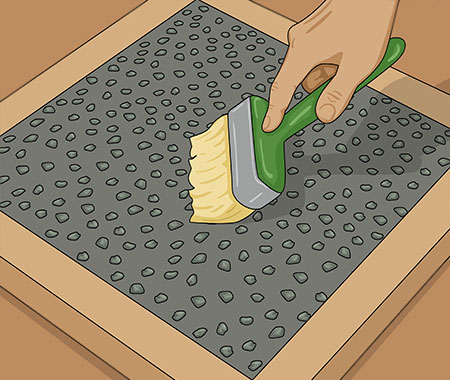
If you have chosen a stone or crushing layer in the surface, wash this with a water-moistened ceiling brush.
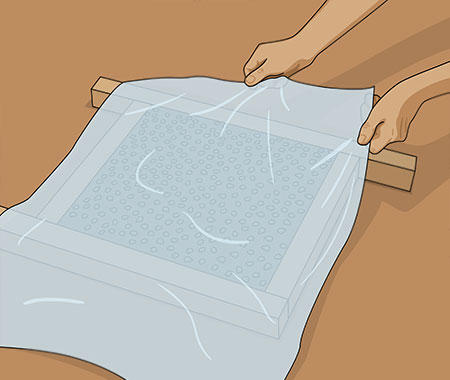
Cover the molds with plastic or damp sackcloth to prevent water evaporation while the concrete hardens.
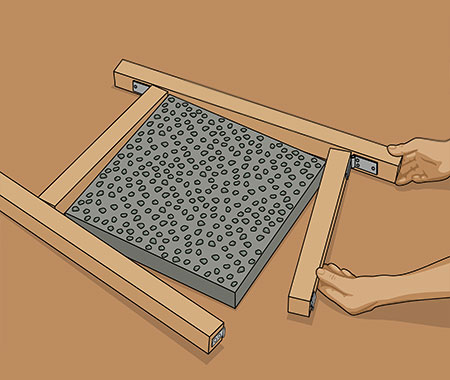
After about four days, the concrete is solidified enough that you can completely open the molds and lift out the concrete slabs.
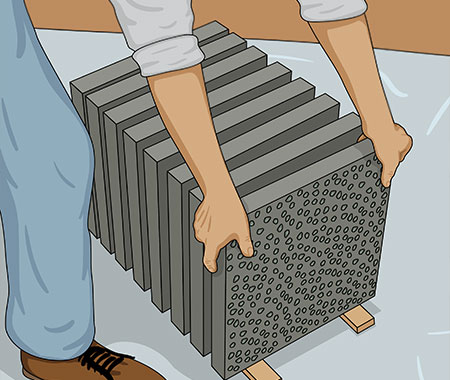
Laying the tiles is dry, however, only after another three weeks or so. During this time, the concrete slabs must be stored upright.
Tip!
– Concrete slabs with smooth surfaces can color different colors by working with equal parts dry cement paint powder and cement and with a grating board work the mixture into the moist concrete surface. After about half an hour, the surface can be steel sanded.
– Round concrete slabs suitable as stepping stones can be cast in a simple cake tin.
Worth knowing
– Concrete slabs with an exposed surface layer of, for example, natural stone or stone crushers become very non-slip, but keep in mind that crushers in particular can feel sharp to walk on with bare feet.
– Half a concrete slab can only withstand half of the load of the entire concrete slab. Therefore, you should increase the thickness of half concrete slabs if they are laid where the load is large.